
Let’s start with a bit of history today. *Documentary music playing in the background*
The so called ‘mantovana’ bread is a traditional bread from Mantua, a beautiful town located in northern Italy, in the region of Lombardy. Its city centre was declared a UNESCO world heritage site back in 2016, so if you’re planning to go to Italy in the future you should definitely include it in your to-visit list. Wandering around it for half a day is simply a magical experience.
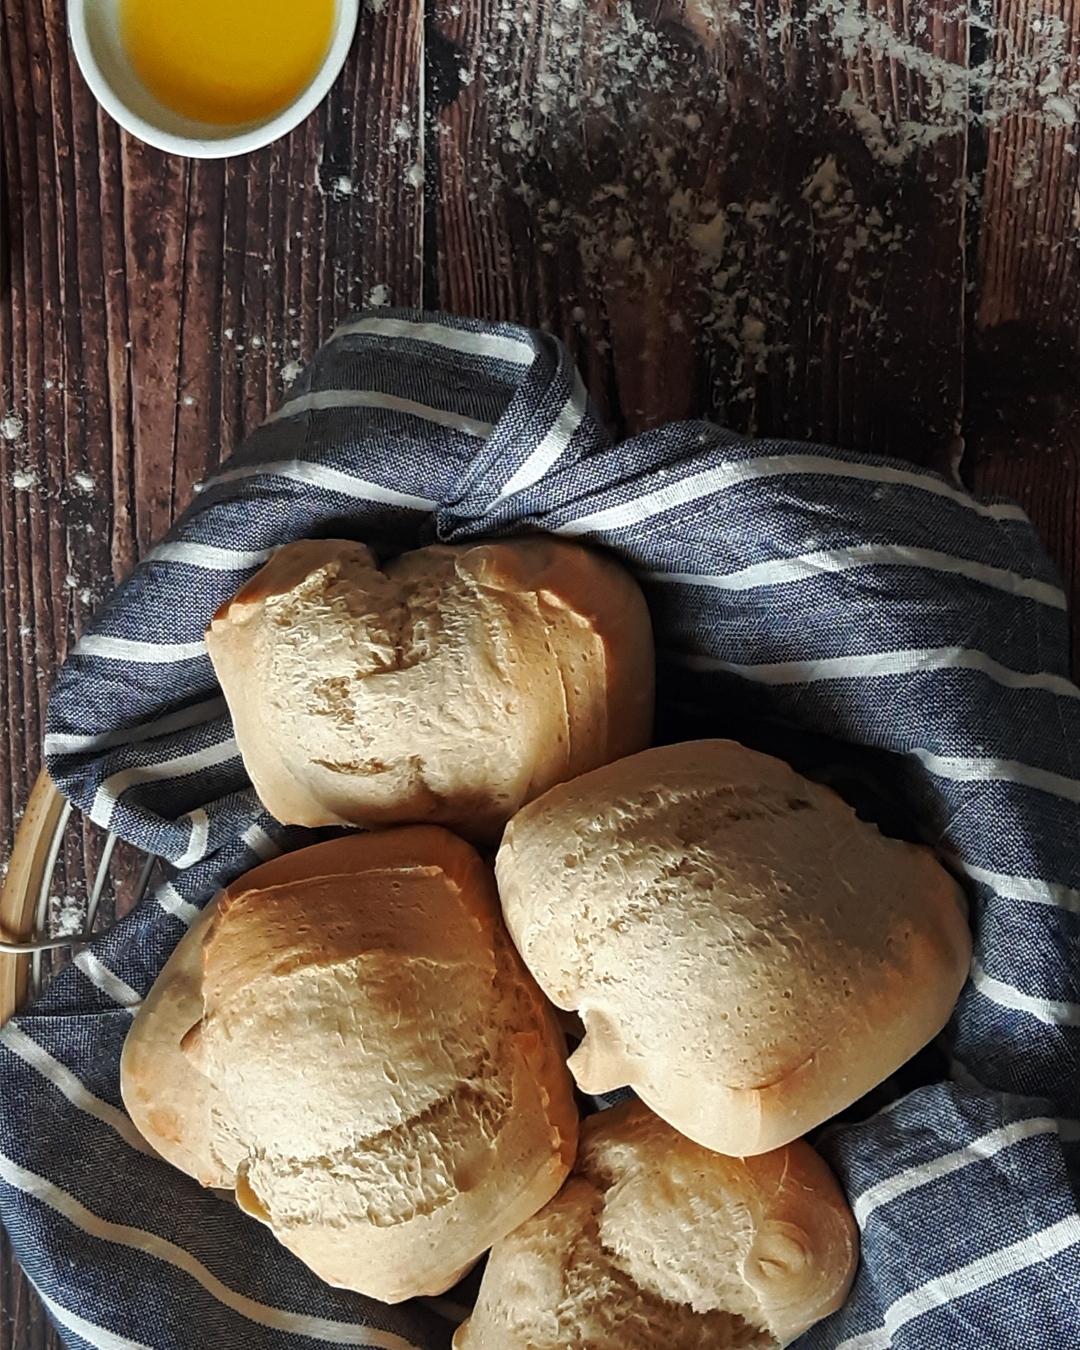
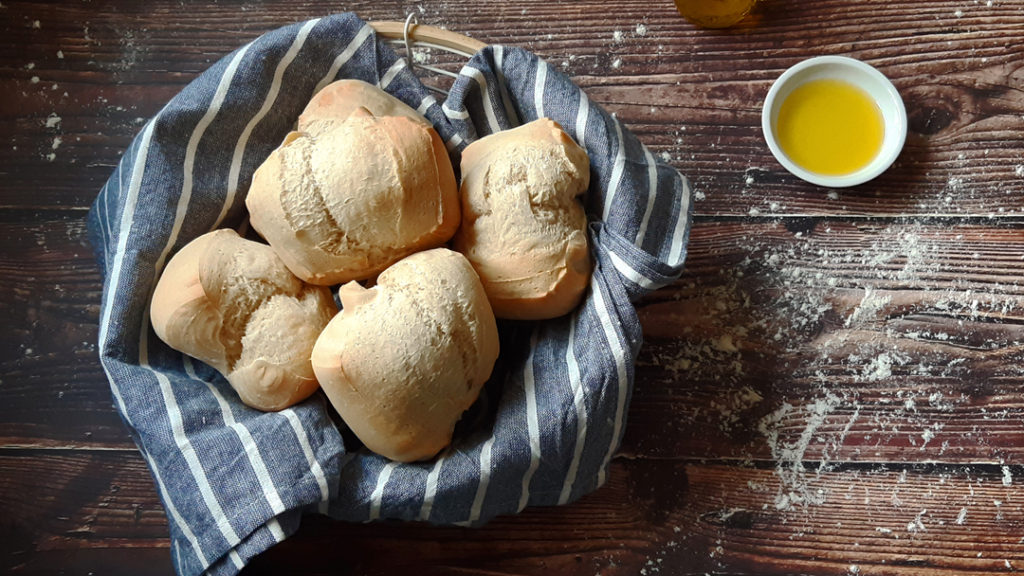
Mantovana happens to be one of my most favourite breads. They have a very thin crust and a soft and compact tasty crumb. In Italy, they’re part of that range of bread that is called “pane comune” (common bread), and I remember my mum buying them very often, since they were very affordable and easily available at local bakeries and supermarkets.
In my time I have probably stuffed them with pretty much anything available: from Nutella to Parma ham to butter and jam to smoked salmon. It’s a very versatile type of bread. I have to admit though, my favourite filling would be a few slices of mortadella with pistachios and a swirl of extra virgin olive oil. Simple bread, simple filling.
That’s also one of the reason why I chose this as one of my first breads to practice with, when I started baking. It wasn’t only simple – although it requires the same old thing, patience, to wait for the dough to raise and develop its awesome texture – but also simple to use. It goes well with both sweet and savoury fillings of any kind. And it smells delicious. And it brings back good memories. And it’s just so comforting.
What else can I say? I really encourage you to try and bake a batch, I am sure you’ll love it. Ah, and don’t forget to have some mortadella at the ready.
Ingredients
FOR THE “BIGA”
- 150g Bread Flour
- 70g water
- 0.5g dry active yeast
FOR THE DOUGH
- 350g bread flour
- 205g water
- 10g salt
- all of the biga, chopped (slice away thin skin that might have forms on the surface and discard)
Method
MAKE THE “BIGA” (day before)
- Sift the flour and place it in a bowl. Mix in the yeast (activate the yeast according to pack instructions, if needed) and water, and add the mixture to the flour. Start kneading and bringing the ingredients together. It will take a bit of time due to the low hydration of the dough. Resist the urge to add more water, it will eventually come together with the humidity of your hands.
- Knead on a bench energetically for a few minutes until you get a smooth dough. Place it in a bowl, cover and let rise at room temperature for 12 hours. The ‘biga’ will be the raising agent for your bread.
MAKE THE FINAL DOUGH
- If using a stand mixer, combine the flour and salt in the mixing bowl. Measure the water in a jug and add the chopped biga. Weigh the water in a jug, tear small pieces of the biga and add it to the water. Stir a few times with a spoon so it starts softening. Add the water and biga to the bowl and, with the hook attachment, knead on low for 5 minutes then medium-low for another 5 minutes. Once finished, turn the dough onto the counter and hand-knead for a minute to smoothen and bring the dough to a ball. Let the dough rise in a warm place (25 to 28°C) for 45 minutes covered with cling film and a tea towel to keep warm.
If kneading by hand, first incorporate all the ingredients in a bowl, then continue kneading by pulling and pushing the dough as much as possible to form the gluten, for about 10 minutes. The dough it’s ready when is very smooth on the surface. Proceed as above for proofing. - Turn the dough onto a floured surface, with bottom side (stickier side) up. Roll out with a rolling pin to about 4mm thickness making sure the dough does not stick to the surface Try to keep it as square as possible. Trim any round sides to make a neat square.
- Cut the dough into strips with a short side of roughly 6cm. Position the strips perpendicularly in front of you and roll them up on the short side towards you making sure the roll is tight and even. Set each roll on a floured tray, seam side down.
Cover and let prove for 2 hours in a warm environment (25 to 28° C). 30 minutes before the proofing time is over, warm up the oven at 180°C fan / 200°C conventional, also heating the tray where you will bake the bread on. - Transfer the breads to the hot baking tray. Make a deep cut (about 1cm) along the middle of each roll (lenghtways) cutting confidently with a sharp knife or a “lame”. The roll should slightly open, like a book. Once in the oven, the spring will open it up completely after a few minutes, achieving the typical Mantovana shape.
- Bake for 15 to 20 minutes, until slightly golden, but still pale-ish. This bread cooks very quickly, due to its low hydration. Take out of the oven and transfer on a wire rack. They will be slightly crispy outside and soft and chewy in the middle.
Leave to cool and then fill with your favourite filling. Or, as I often do, simply eat it plain.