
Yesterday evening I realised there was no sourdough bread left in my freezer. Needed some for dinner next day. No panic, right time to go for my seeded overnight no-knead loaf recipe, inspired by a method popularised by food writer Mark Bittman (but with just some tweaks here and there of course). And…bread was on the table right on time.
Yes, you read it right. No bread kneading required, very little effort, this recipe is going to become one of your go-to pre-party staples or (almost) last minute bread-needing-dinners.
Ok, I am a purist. Or at least I think I am. I always try to make-bake-create everything from scratch, as much as possible. And if there is one thing that I learnt from my granny and mum is that good food takes time. And that is true. Although sometimes we may not have all that time. And let me make it clear, once and for all: that is ok.
As a matter of fact, Italian cuisine is the emblem of simplicity, it just requires a little bit of care. Care is different from time (at least in an Italian kitchen). That is the thing: nature gives us all we need to make a fantastic and flavourful dish or bake. Bread as well. Some dishes may require longer, some just shorter. And again, that is ok, flavour is what matters and this recipe proves the rule. In this case, you just need to be patient enough to see what happens when yeast meets flour, you just need to remember that you need to start it all the day before.
Believe me, I am often in a hurry, and I have now done this recipe several times and it has never proved wrong. Try to include it in your weekly routine and you’ll have endless supply of fresh and delicious bread.
If you still have very little time but feel like trying something nice and easy, why not try my soft amaretti biscuits recipe, or maybe my other no-knead bread recipe.
Makes 1 loaf (about 850g)
Ingredients
- 360g strong white bread flour (use good quality, possibly organic)
- 185g wholewheat flour (I used Brixton Windmill)
- 350ml lukewarm water at about 38℃
- 1g instant/fast action yeast
- 13g fine sea salt
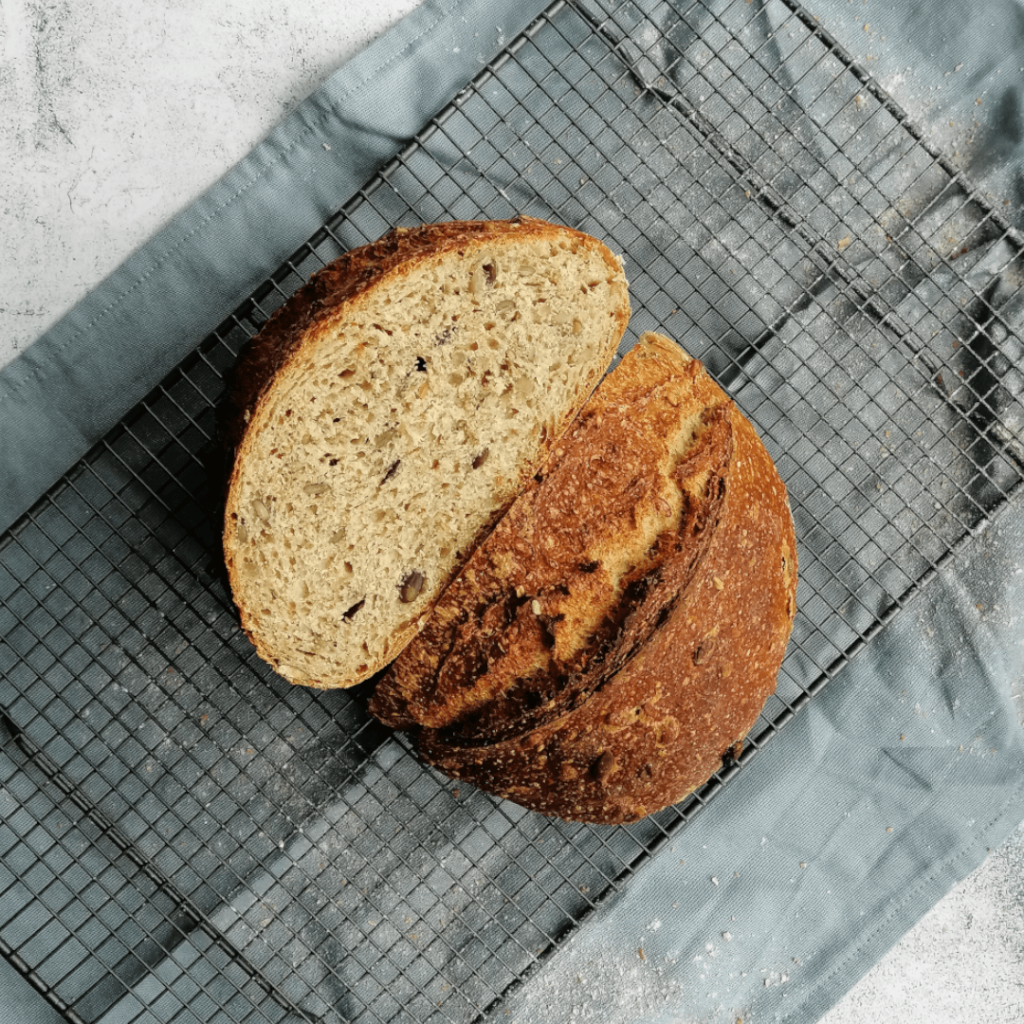
- 100g mixed seed (pumpkin, sunflower, sesame seeds)
- 3Tbsp clear runny honey
SPECIAL EQUIPMENT
- Ovenproof casserole / Dutch oven / cloche (optional, see note at the end of the recipe)
Method
- Combine the flours, yeast, salt and seeds in a large mixing bowl. Give it a good stir to disperse and mix all ingredients evenly. Make a well in the centre. Stir the honey into the lukewarm water and pour it in the well at once. Mix with a dough whisk or a wodder spoon until you obtain a shaggy sticky mass. Just ensure all the powders have been incorporated and no dry bits are visible. Cover with a lid or cling film and leave to rest at room temperature overnight (at least 8-10 hrs).
- The following day uncover the bowl and scrape the “wannabe” dough onto a floured surface. It should be tacky but not so sticky that you cannot handle it. Give it a little stretch, without letting the gases out and fold the two sides over the middle, forming a rounded shape with your hands. Cover with the bowl and leave to rest for 10-15 minutes to relax.
- Line a baking tray with baking paper and dust it lightly with flour. uncover the dough and, using a dough scraper or your hands, turn it around to form a ball shape, creating a bit of tension on the surface. Sprinkle with a little more flour, transfer onto the baking tray and cover again with the upturned bowl. Transfer inside an oven with only the light on (no heat) and leave to prove for 1.5 hours.
- Take the dough out of the oven and continue proving in a warm place. Switch on the oven and pre-heat the oven to 220°C, heating up the casserole/cloche you will bake the bread in. When proving time has passed and you are ready to bake, turn the dough over onto a parchment sheet, flour the surface and score across the middle with a sharp knife or a lame, holding it at an angle. Transfer into the casserole, replace the lid and bake for 30 minutes.
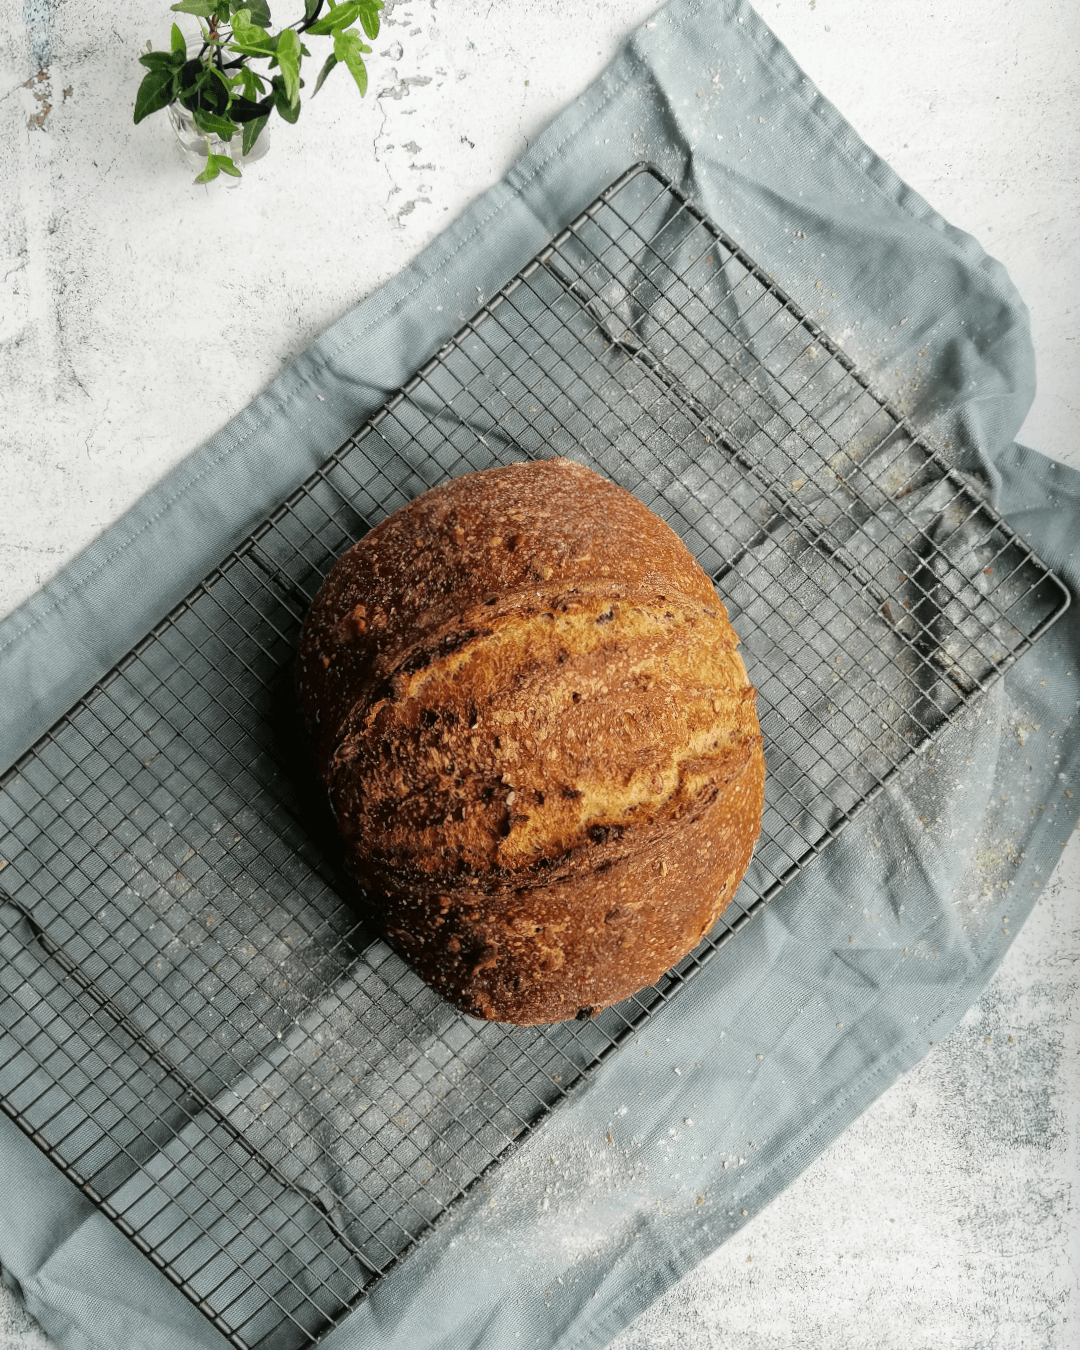
- After 30 minutes, take the lid off and bake for another 10 to 15 minutes until the crust is crispy and caramelised. Remove from the oven and leave to cool completely over a rack. Slice and enjoy with your favourite topping, or simply on its own with some butter or extra-virgin olive oil.
NOTE: If you don’t own an ovenproof casserole or a Dutch oven, no worries! Just add these steps to points 5 and 6 above:
- When you switch on the oven to heat, leave the oven tray in to heat up too. Also place a metal traybake or deep loaf tin on the oven bottom to heat up.
- When nearly ready to bake, boil the kettle. Transfer the cob onto the parchment and onto the heated oven tray. Pour some boiling water into the other metal container in the oven, so it will create steam while the bread is baking, slowing the formation of the crust. If you have a mister or spray bottle, spray the sides of the oven after you poured the water, for an extra burst of steam.