
When I first launched the Italian baker, one of my best friends, who is vegan, asked me if I was planning to post any vegan recipes on the blog any time soon. He sort of caught me “off guard”, since I honestly hadn’t thought about it yet. True, I had baked vegan goodies before, but always following other people’s recipes rather than putting proper thought into it. And, I must say, pretty much always with poor results. So much that I kind of gave up on any vegan dessert.
Anyway, how could I give up on one of my friends’ requests? You know, I love a challenge.
I went for what I thought it would be a fairly easy ingredient to work with for vegan dessert (or easier than others, at least), and one that I know my friend would love, chocolate. However, I also wanted to take it a bit further and elevate it by adding at least another flavour and make it totally moreish. Hence the idea, gianduia.
I love gianduia, it is my favourite type of chocolate. For those of you who might not know, gianduia is an Italian paste of hazelnuts, cocoa and sugar. It was invented in the Piedmont region, which is very famous for its extraordinary quality of hazelnut production (I was a documentarian in a previous life).
It took me a little bit of experimenting to perfect this recipe, particularly to understand how to use different plant-based products that I had never used before. It was lots of fun, and I got some weird reactions as well.
But I have been very diligent, I have read a lot, and I have been practising a lot (and when I say a lot, I mean A LOT), and boom! I am proud to say that finally, after many gelatinous lumps, here it comes my first vegan recipe.
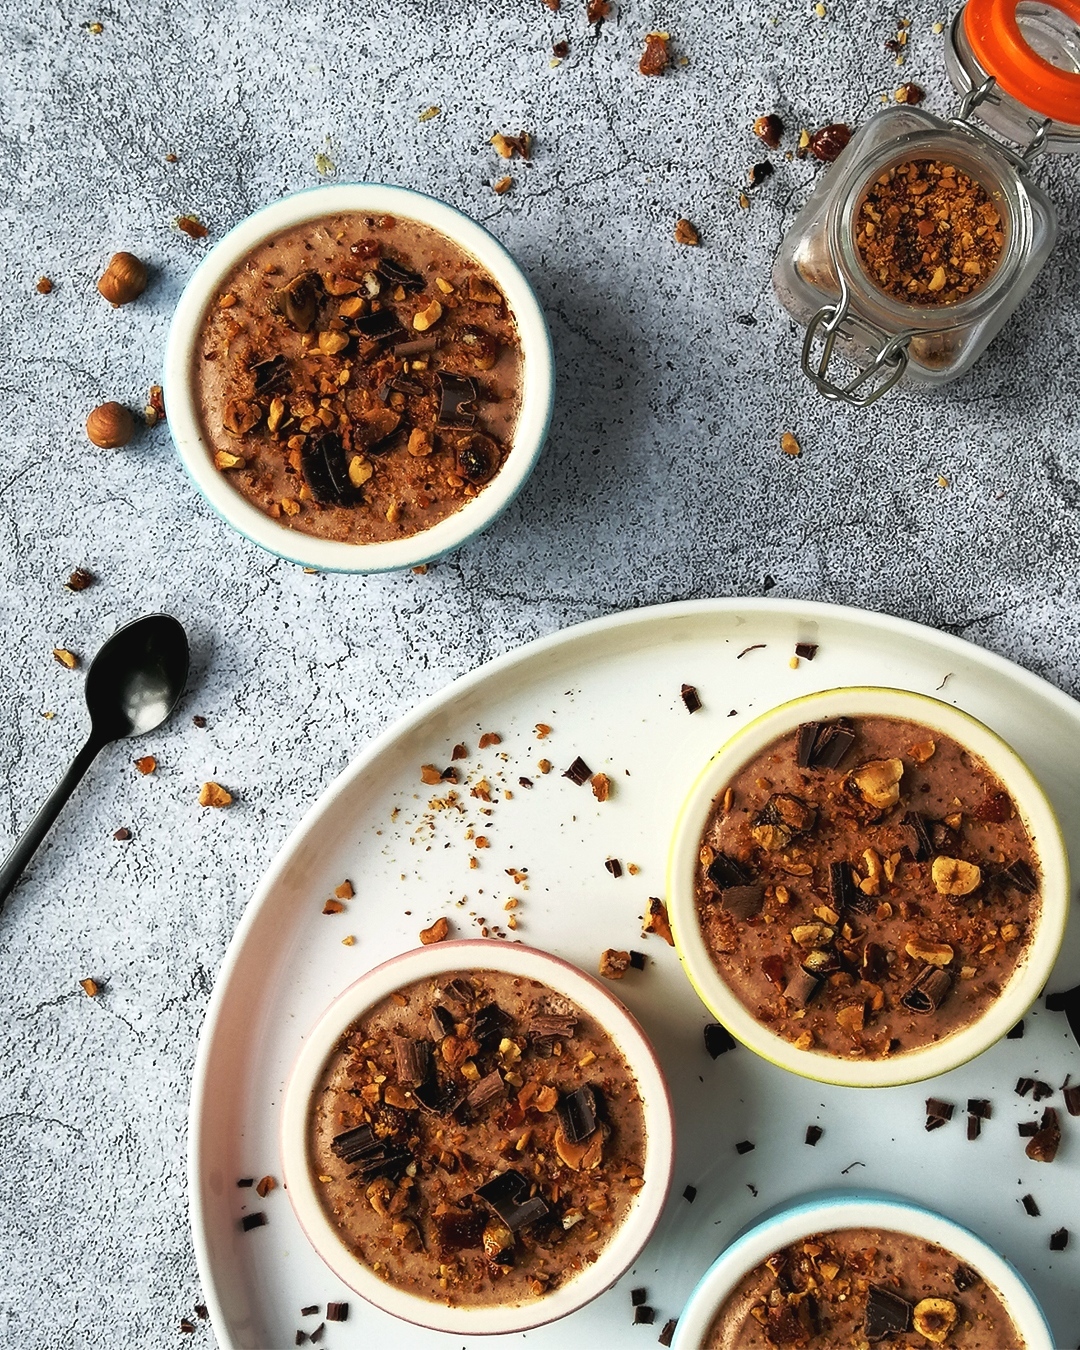
A silky gianduia and dark chocolate ganache, a rich and creamy gianduia chocolate mousse, and a crunchy hazelnut praline for the perfect finishing touch. I have called these ‘totally gianduia’ pots. Vegan ‘totally gianduia’ pots.
Believe me, everyone will love it.
Perfect for entertaining, you can make these ahead of time, pop them in the fridge and just take them out when it’s dessert time. Decorate them with the praline and some chocolate shavings just before you serve them. What else can I say? I promise these will instantly earn a spot in your recipe book or repertoire, as it did with mine.
Note: for this recipe, I tried different brands of hazelnut milk. However, most of them contain some gelling agents that did cause an adverse reaction to the gelling agent I used in the mousse, giving it a lumpy texture. Therefore, I recommend you to buy some hazelnut milk/drink with no gelling agent amongst the ingredients, such as Rude Health hazelnut drink (which also tastes great by the way – and no, they’re not paying me for this promotional line, I just want to save you from getting a lumpy mousse).

Makes 6 pots or ramekins (mine are 135ml per pot)
Ingredients
FOR THE GIANDUIA GANACHE
- 75g good quality 70% dark chocolate (make sure it’s suitable for vegans)
- 100g plant based cream (I used Elmlea plant double)
- 75g vegan hazelnut spread (I used Vegó crunchy)
FOR THE GIANDUIA MOUSSE
- 190g hazelnut milk (I used Rude Health hazelnut drink)
- 110g vegan hazelnut spread
- 3g agar-agar powder
- 30g agave or maple syrup (2 tbsp)
- 0.5g salt (small pinch)
- 260g plant based cream, to whip
- 15g icing sugar (1.5 tbsp)
FOR THE HAZELNUT PRALINE
- 40g Hazelnuts
- 30g sugar
- 7.5g water (1/2 tbsp)
TO FINISH
- Dark chocolate shavings
SPECIAL EQUIPMENT
- Food thermometer
Method
MAKE THE GIANDUIA GANACHE
- Heat the oven to 180°C. In the meanwhile, chop the dark chocolate and transfer it to a small bowl. Heat the cream until boiling point, then remove from the heat and pour over the chocolate. Leave to melt for about 3 minutes. Using a spatula, stir the mix from the middle until it comes together in a glossy and shiny ganache. Add the hazelnut spread and mix until combined.
- Pour 35g of the mix into each of the pots. Tap the bottom of the pot a few times onto the palm of your hand to spread the ganache evenly. Transfer the pots onto a tray and refrigerate while you make the rest of the dessert.
MAKE THE HAZELNUTS PRALINE
- Distribute the hazelnuts on a small oven tray/dish lined with baking parchment or silicone mat and roast in the oven for about 15 mins. Remove and leave to cool slightly. While they cool, pour the sugar and water into a small pan and bring to the boil over a medium heat. When boiling, keep heating until the temperature reaches 107°C.
- Once the desired temperature is reached, add in the hazelnuts and keep stirring for about 3 minutes, or until the hazelnut have caramelised (the caramel should be nice and golden). Pour the whole content of the pan back onto the lined tray and leave to cool completely.
MAKE THE GIANDUIA MOUSSE
- First of all, pour the cream into a medium sized bowl or stand mixer and whip until you achieve stiff peaks. Plant based cream takes a bit longer to whip than dairy cream. To test it, carefully try to flip the bowl upside down. If the cream starts to slide down the sides, whip it a bit more. Cover with cling film and refrigerate until ready to use.
- Pour the hazelnut milk in a small pan, sprinkle the agar agar all over it and stir briefly to dissolve. Bring to the boil over a medium heat, stirring often to make sure the agar agar doesn’t create any lumps. When boiling, set a timer and continue stirring for five minutes to fully activate the agar agar. In the meanwhile, transfer the hazelnut spread, agave syrup and salt to a medium sized bowl and stir to combine.
- Once five minutes have passed, pour the hot liquid over the hazelnut spread mix and stir from the middle with a spatula until fully emulsified, it should look shiny and glossy. Take the whipped cream out of the fridge and gently fold into the hazelnut spread and milk mixture in three times, retaining as much air as possible.
- Once the mousse is fully incorporated, take the pots/ramekins out of the fridge and fill them up to the top with the mousse. Don’t worry if the mousse is a bit runny, it’s perfectly normal. It will set in the fridge. Using a spatula or palette knife, flatten the top of each mousse removing any excess and clean the rims using a small napkin or your fingers. Transfer to the fridge and leave to set for at least 3 hours.
FINISH AND SERVE
- Once it’s cooled transfer the hazelnut praline to a food processor and whiz to small crunchy bits (but not a powder). Using a vegetable peeler or a small knife, shave some chocolate shavings off the leftover chocolate. Take each pot out of the fridge 10 minutes before serving, decorate with the hazelnut praline and chocolate shavings to your liking and serve immediately.